SMTP Configuration
Step 1: Enter the Sender Email Address
To configure the SMTP email service type, perform the below steps.
-20250812-160702.png?inst-v=a692bc81-ccf3-41f9-8111-9595c4b8338b)
SMTP
Enter the Sender Email address. This email will be used for all communication such as alerts & notifications. This must be a real, valid email address.
In the Sender Authentication Service field, select SMTP option from the dropdown menu.
To set up SMTP email service and send email from a custom domain (e.g., example@domain.com), we require the following from the customer:
Email ID
App password - This is not the mailbox login password. Instead, it is a special password used specifically for sending emails via SMTP. It can be generated by following the below steps.
Step 2: Login to Office 365
Sign in to office365.com
Log in with the Email ID and Password.
After logging in, click on the profile icon and click on View Account.
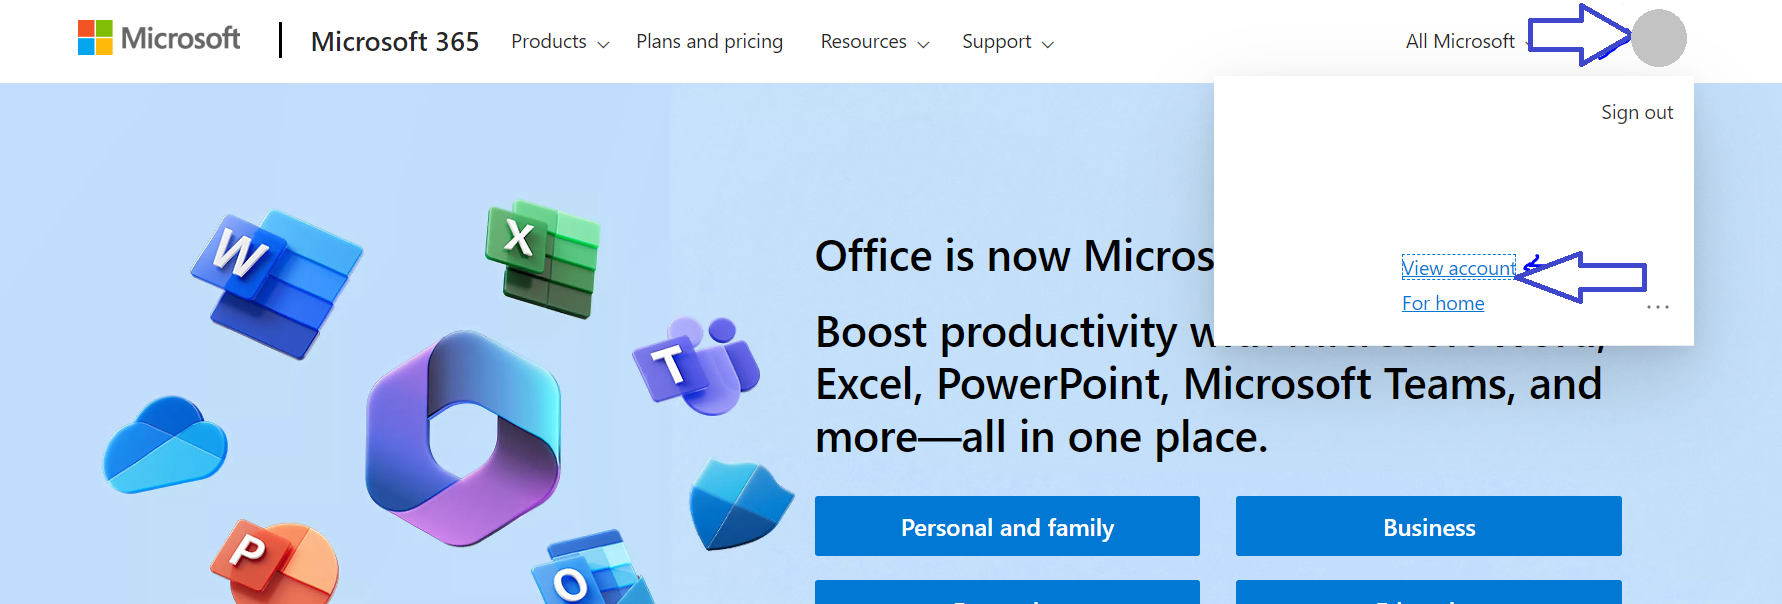
View Account
Click on Security Info Tab on the left side menu bar.
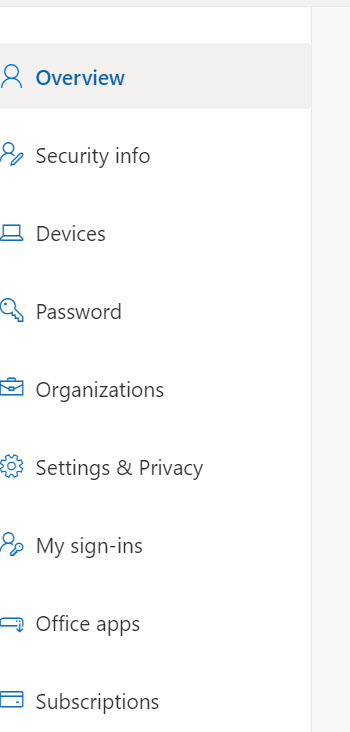
Security Info
Click on Add sign-in method option on the right-hand side.
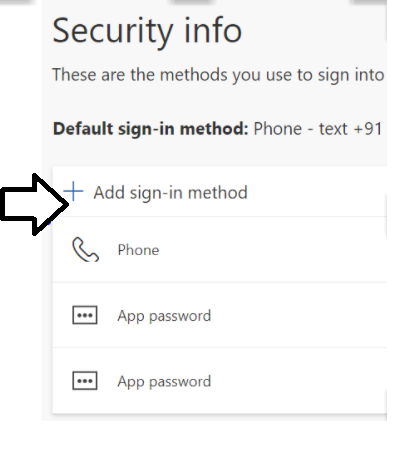
Add sign-in method
Step 3: Create App Password
Now choose App Password option.

Add a method
Now click on Add button.
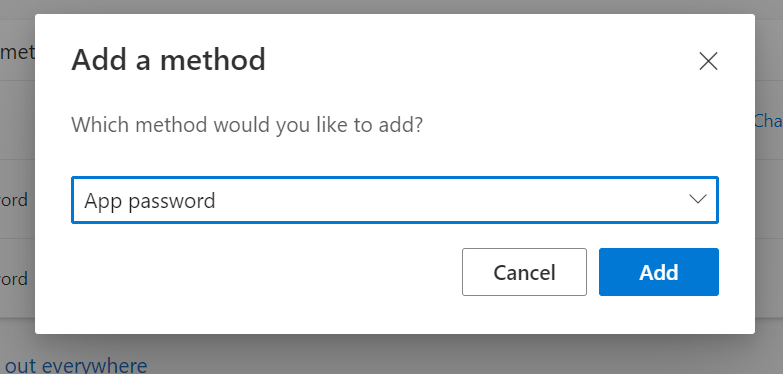
App Password
Enter any user-defined name in the dialog box.
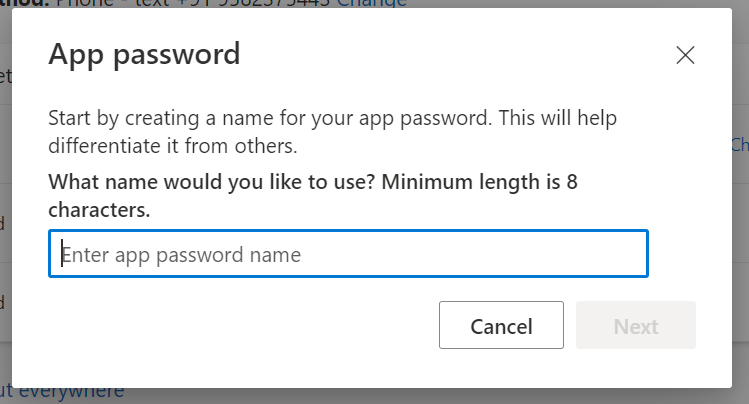
Enter App Password Name
Now, Click on the Next button. The app password will be generated.
Copy the password shown in the dialog box.
This is the password to be entered in the Configuration dialog box.
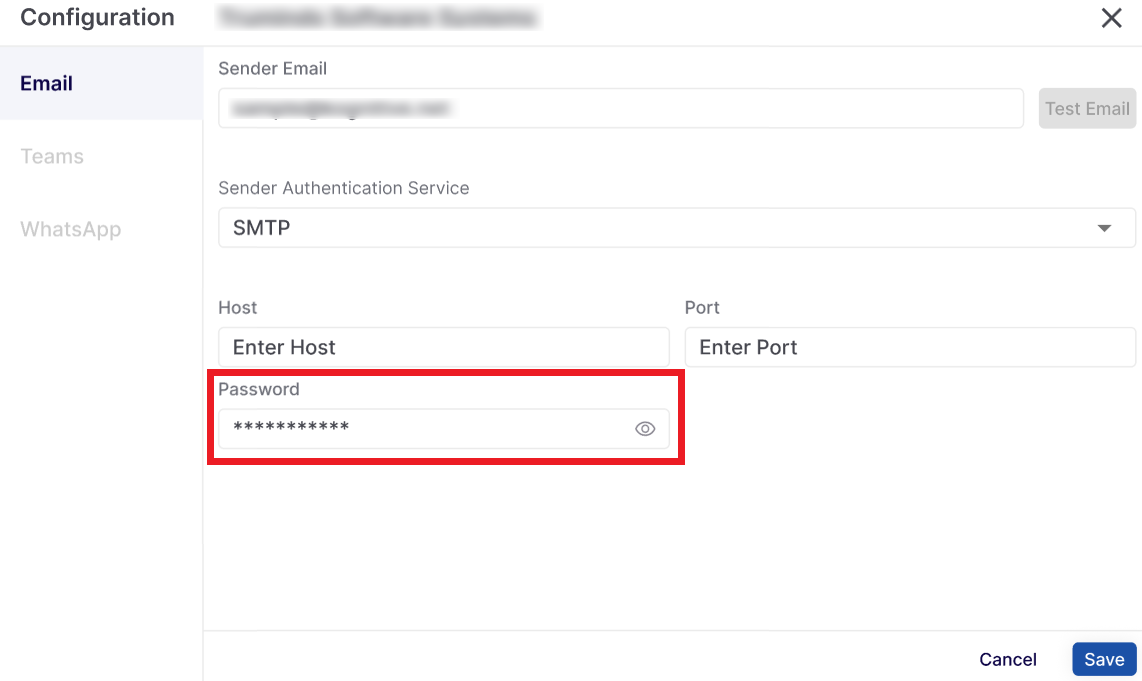
Password - Configuration Dialog Box
Click the Save button to save the configuration.
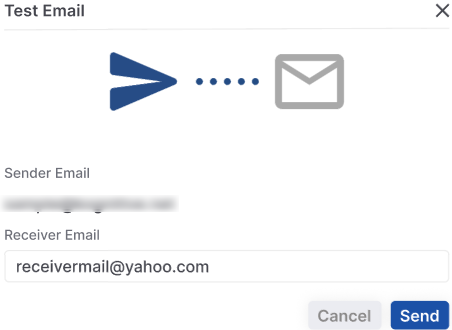
Step 4: Test Your Email Setup
After successful verification:
You will see the “Test Email” option.
Test Email
Enter any valid recipient email address.
Click Send button.
You will receive a test email to confirm that your domain setup is working.
If you’re not receiving the test email, please contact our support team.
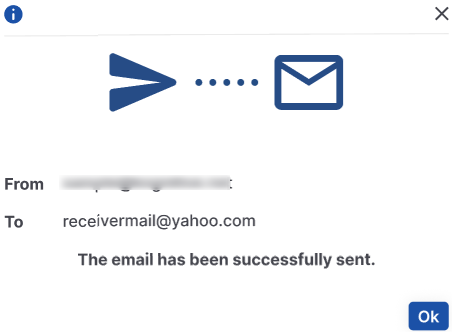
Email successfully sent
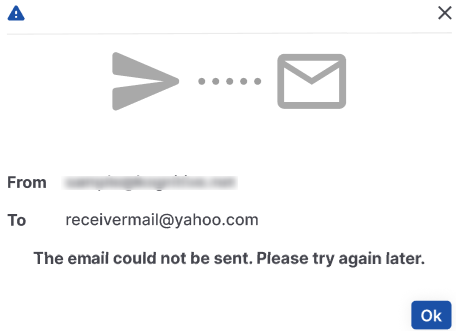
Email could not be sent
Step 5: Activate Email Sending (to be performed if you received a test email in step 4)
Once you're satisfied with the test:
Click the “Activate” button on the Kognitive Cloud page.
After activation, all emails sent through our system will use the Sender Email ID you entered earlier.
Setup Completed. After activation:
Your domain is authenticated.
Your emails will be sent using your domain.
Troubleshooting steps
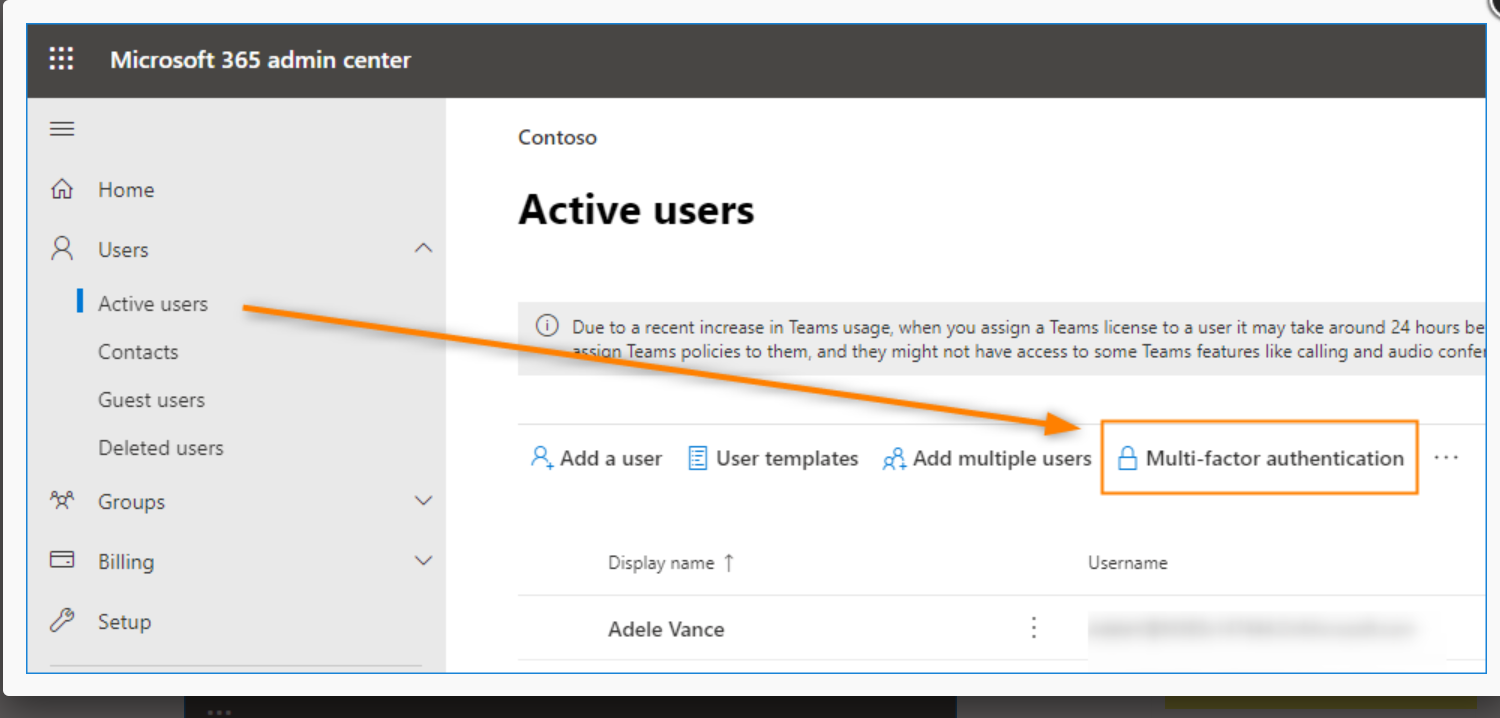
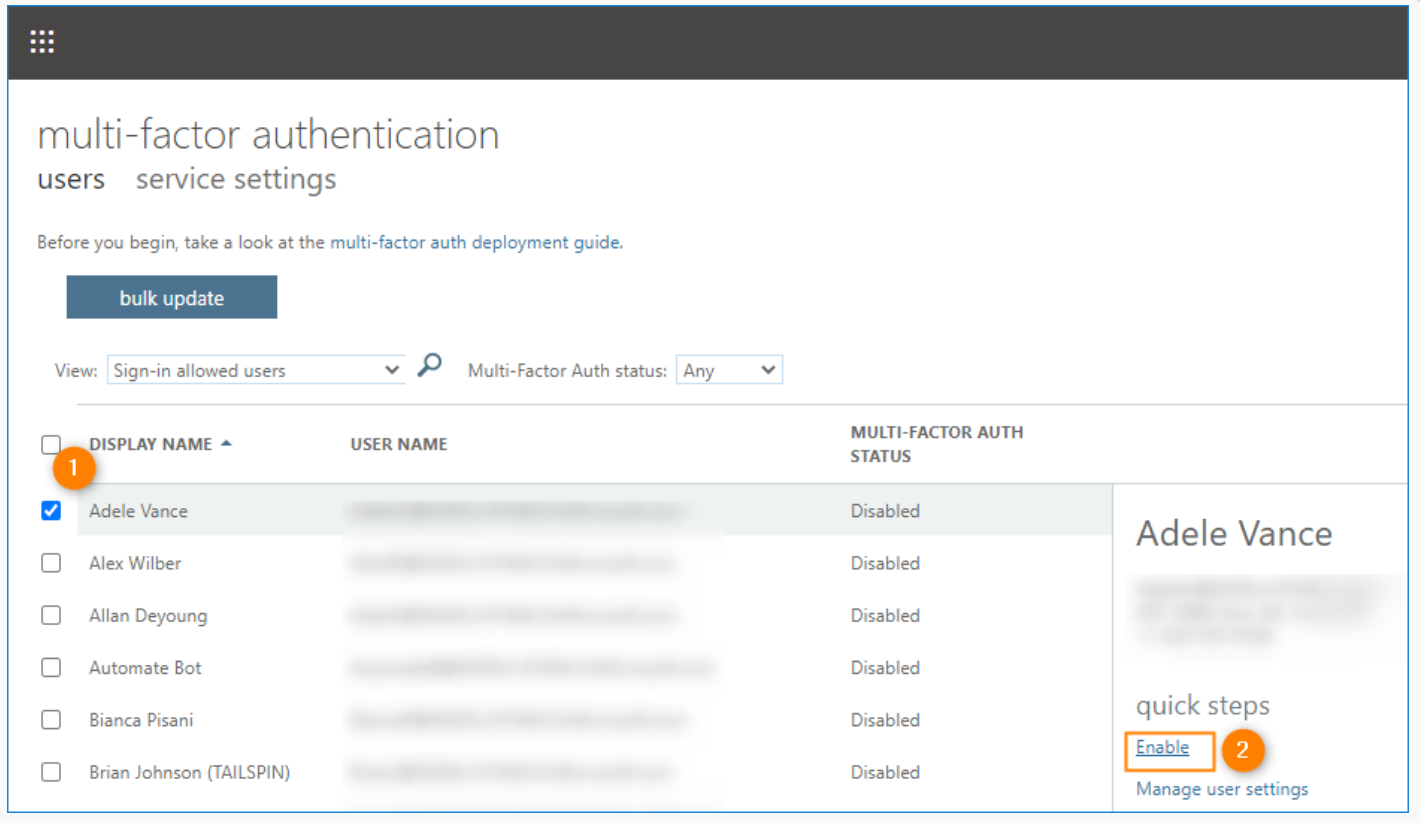
Question: What if the app password option is not visible?
Troubleshooting - 1
https://learn.microsoft.com/en-us/answers/questions/522899/unable-to-use-the-app-passwords-feature
Troubleshooting - 2
https://www.codetwo.com/admins-blog/cannot-create-app-password-office-365/
To make sure Allow app password option is enabled and MFA is enabled for the account
-20250812-193717.png?inst-v=a692bc81-ccf3-41f9-8111-9595c4b8338b)
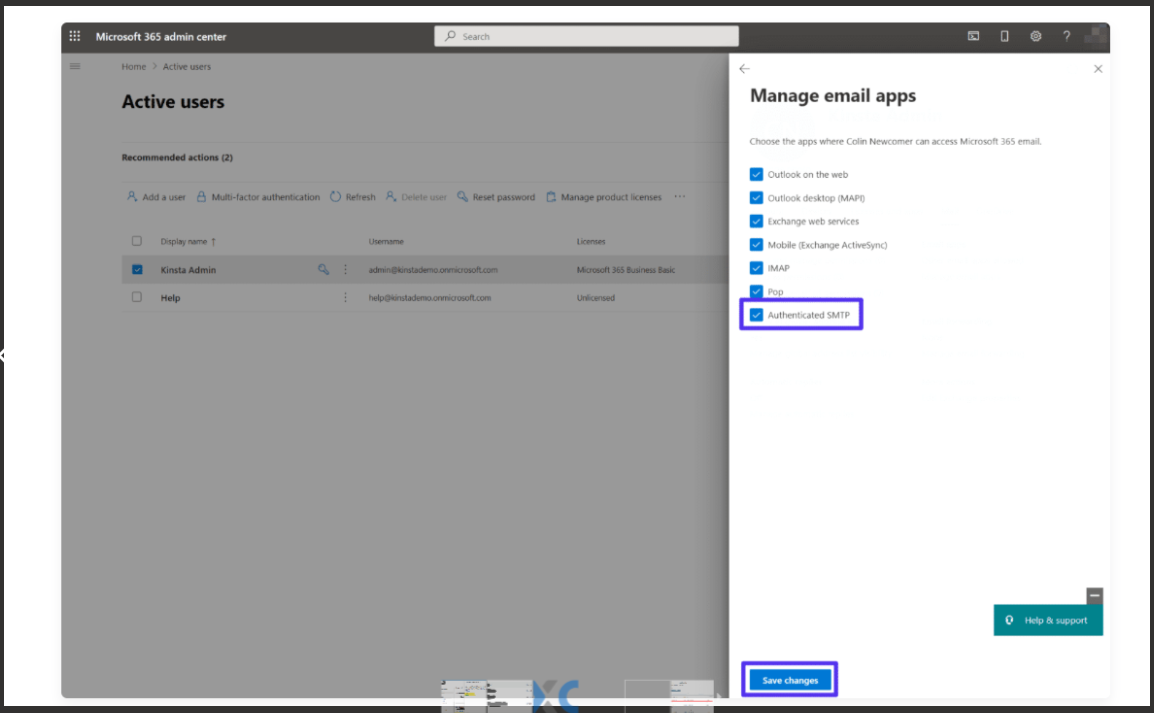
To make sure SMTP Authentication is Enabled
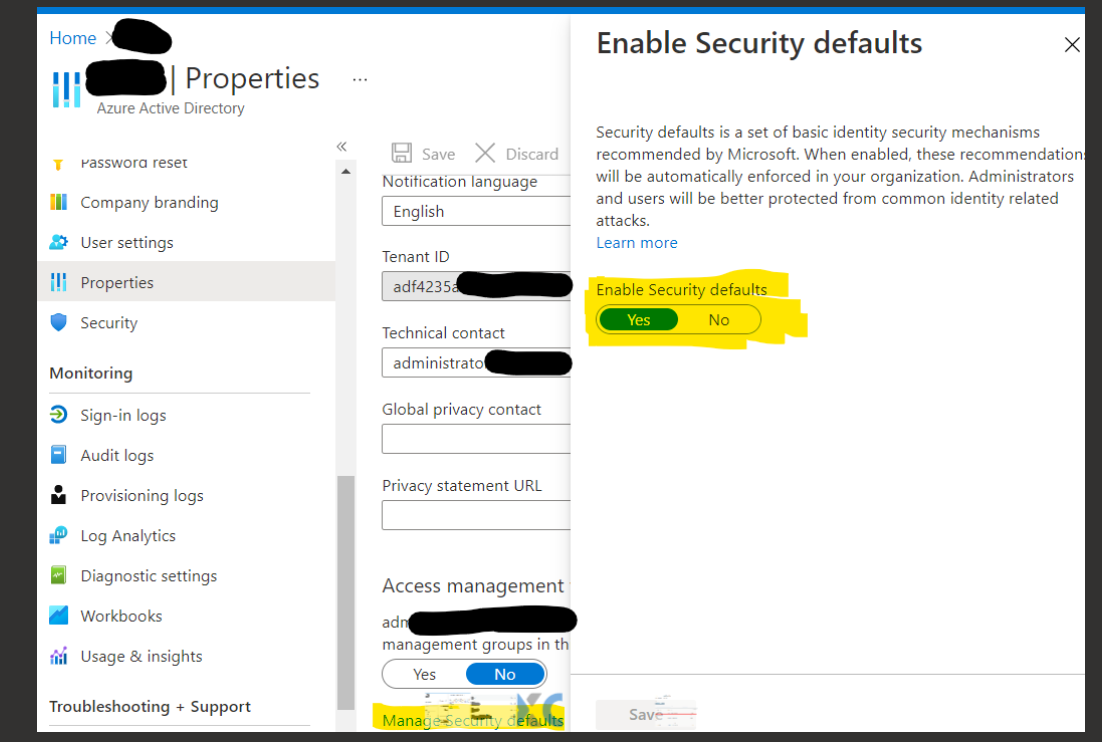
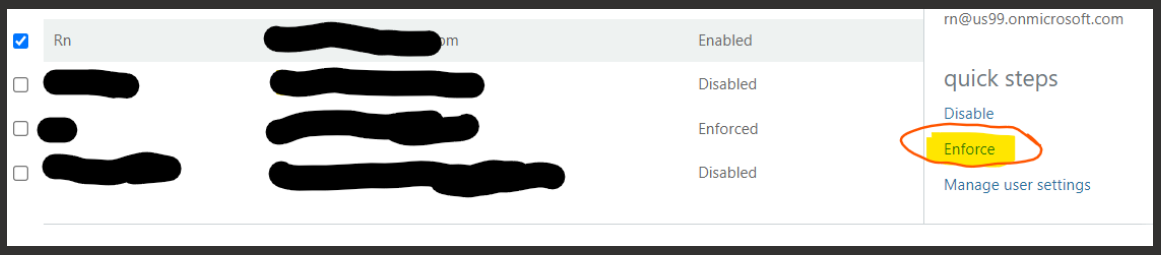
Security Defaults should be disabled and Try enforce option
Troubleshooting Steps in mail sending is fail
The SMTP server requires a secure connection or the client was not authenticated - Microsoft Q&A